2015 年底,多家公司就联合声明:呼吁运营商严格打击流量劫持。但是,能够实施这一攻击行为的目前也就是各地的宽带运营商了,让贼捉贼怎么可能?!况且, 在某些地区,这种劫持文件并插入广告的方式已经成为他们轻松来钱的“优质”渠道了,怎能轻易放手!所以,从 15 年起,很多大型网站开启了 HTTPS ,包括 淘宝、百度等。
鉴于国内网络环境复杂,建议大家也尽快支持 HTTPS。尤其是国内云厂商基本都支持 Let’s encrypt 免费证书了,无论申请还是开启 Let’s encrypt 证书都很方便了。
关于流量劫持,常见的就是网页内容被插入各种广告!而这些网站本身源代码并没有植入广告,这种方式的流量劫持属于中间人攻击(Man-in-the-Middle Attack,MITM)的一种,其实质就是在数据通路上劫持文件并篡改(一般是加入广告代码),并将篡改后的文件 发送给客户端。在这种攻击下,源服务器上的文件是不受影响的,文件被篡改是发生在传输过程中,由于 HTTP 协议完全是明文传输,很容易被劫持、篡改,因此,只要文件在 加密通道中传输就能够避免被劫持、篡改。
一、获取 Let’s encrypt 免费证书
建议使用git工具,安装部署时需要Python2.7的支持,linux默认都装了python ,本案例在centos7下进行
如果没有以上依赖,请先安装:
- shell# yum install git #安装git
- shell# git clone https://github.com/letsencrypt/letsencrypt #获取源码
二、生成证书密钥
- shell# cd letsencrypt
- shell# ./letsencrypt-auto certonly --standalone --email 354867750@qq.com -d chenweikang.top -d www.chenweikang.top
- #以下为交互日志
- Saving debug log to /var/log/letsencrypt/letsencrypt.log
- Plugins selected: Authenticator standalone, Installer None
- -------------------------------------------------------------------------------
- Please read the Terms of Service at
- https://letsencrypt.org/documents/LE-SA-v1.2-November-15-2017.pdf. You must
- agree in order to register with the ACME server at
- https://acme-v01.api.letsencrypt.org/directory
- -------------------------------------------------------------------------------
- (A)gree/(C)ancel: A
- -------------------------------------------------------------------------------
- Would you be willing to share your email address with the Electronic Frontier
- Foundation, a founding partner of the Let's Encrypt project and the non-profit
- organization that develops Certbot? We'd like to send you email about EFF and
- our work to encrypt the web, protect its users and defend digital rights.
- -------------------------------------------------------------------------------
- (Y)es/(N)o: Y
- Obtaining a new certificate
- Performing the following challenges:
- tls-sni-01 challenge for chenweikang.top
- tls-sni-01 challenge for www.chenweikang.top
- Waiting for verification...
- Cleaning up challenges
- IMPORTANT NOTES:
- - Congratulations! Your certificate and chain have been saved at:
- /etc/letsencrypt/live/chenweikang.top/fullchain.pem
- Your key file has been saved at:
- /etc/letsencrypt/live/chenweikang.top/privkey.pem
- Your cert will expire on 2018-03-17. To obtain a new or tweaked
- version of this certificate in the future, simply run
- letsencrypt-auto again. To non-interactively renew *all* of your
- certificates, run "letsencrypt-auto renew"
- - Your account credentials have been saved in your Certbot
- configuration directory at /etc/letsencrypt. You should make a
- secure backup of this folder now. This configuration directory will
- also contain certificates and private keys obtained by Certbot so
- making regular backups of this folder is ideal.
- - If you like Certbot, please consider supporting our work by:
- Donating to ISRG / Let's Encrypt: https://letsencrypt.org/donate
- Donating to EFF: https://eff.org/donate-le
在 /etc/letsencrypt/live/chenweikang.top 目录下会生成4个文件,分别为Apache和Nginx用到的:
cert.pem - Apache服务器端证书
chain.pem - Apache根证书和中继证书
fullchain.pem - Nginx所需要ssl_certificate文件
privkey.pem - 安全证书KEY文件
- [root@iz2zeeuc8ed3wflgmb7rakz chenweikang.top]# ll
- total 4
- lrwxrwxrwx 1 root root 39 Dec 17 17:13 cert.pem -> ../../archive/chenweikang.top/cert1.pem
- lrwxrwxrwx 1 root root 40 Dec 17 17:13 chain.pem -> ../../archive/chenweikang.top/chain1.pem
- lrwxrwxrwx 1 root root 44 Dec 17 17:13 fullchain.pem -> ../../archive/chenweikang.top/fullchain1.pem
- lrwxrwxrwx 1 root root 42 Dec 17 17:13 privkey.pem -> ../../archive/chenweikang.top/privkey1.pem
- -rw-r--r-- 1 root root 543 Dec 17 17:13 README
三、Nginx配置Https
根据自己网站配置,对nginx或apache进行配置,橘红色为我新增的,
关于http重定向到https有多种方式,这里使用rewrite重定向
- server {
- listen 80;
- server_name www.chenweikang.top chenweikang.top;
- root /home/wordpress/server;
- index index.html index.htm index.php;
- error_page 404 /ERROR/404.html;
- #访问http时跳重定向到https
- if (-f $request_filename/index.html){
- rewrite (.*) https://$host$1/index.html break;
- }
- if (-f $request_filename/index.php){
- rewrite (.*) https://$host$1/index.php;
- }
- if (!-f $request_filename){
- rewrite (.*) https://$host$1/index.php;
- }
- location ~ \.php$ {
- fastcgi_pass 127.0.0.1:9100;
- fastcgi_index index.php;
- include fastcgi.conf;
- }
- }
- server {
- listen 443 ssl;
- ssl on;
- #指定pem格式的证书
- ssl_certificate /etc/letsencrypt/live/chenweikang.top/fullchain.pem;
- #指定私钥
- ssl_certificate_key /etc/letsencrypt/live/chenweikang.top/privkey.pem;
- server_name www.chenweikang.top chenweikang.top;
- root /home/wordpress/server;
- index index.html index.htm index.php;
- error_page 404 /ERROR/404.html;
- if (-f $request_filename/index.html){
- rewrite (.*) $1/index.html break;
- }
- if (-f $request_filename/index.php){
- rewrite (.*) $1/index.php;
- }
- if (!-f $request_filename){
- rewrite (.*) $1/index.php;
- }
- location ~ \.php$ {
- fastcgi_pass 127.0.0.1:9100;
- fastcgi_index index.php;
- include fastcgi.conf;
- }
- }
重新加载nginx,尝试使用http访问 ,若配置正确,会自动重定向到https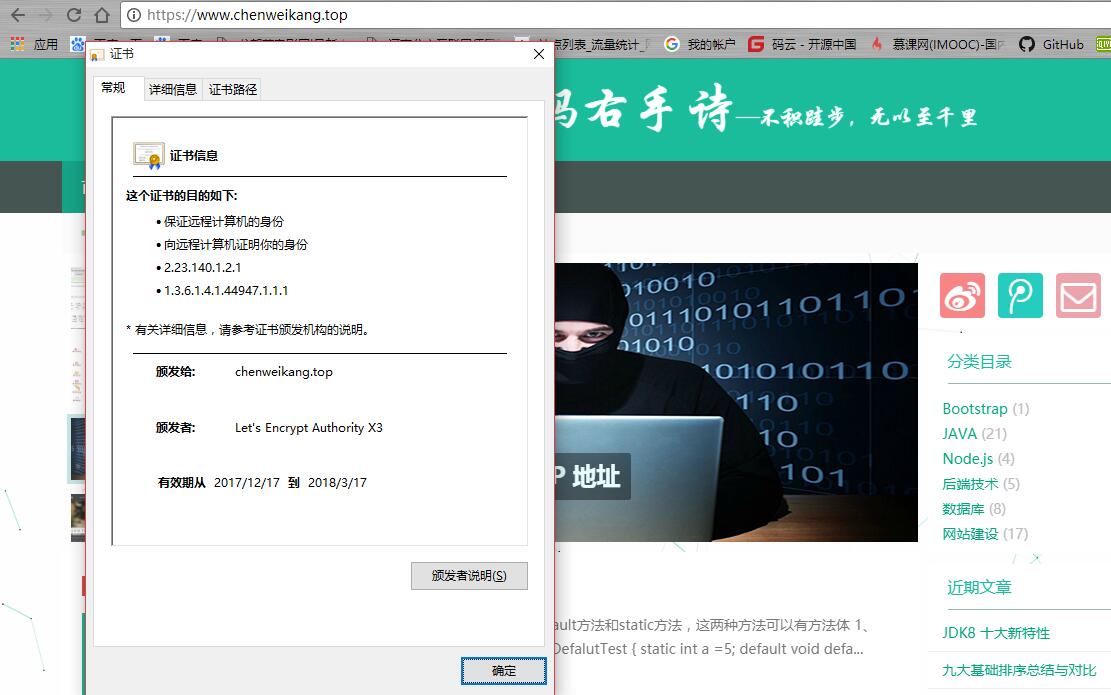
最后
Let's Encrypt 有效期为90天,我们可以创建脚本加入定时任务,自动生成密钥
编写脚本 vim /root/createSSL.sh
- [root@iz2zeeuc8ed3wflgmb7rakz letsencrypt]# vim createSSL.sh
- #!/bin/bash
- logDir="/root/createSSL.log"
- echo "-------------重新生成证书["`date`"]--------" >> $logDir
- echo "stop nginx : ok " >> $logDir
- #停止nginx
- systemctl stop nginx >> $logDir
- echo "生成证书 : " >> $logDir
- #重新生成证书
- /software/temp/letsencrypt/letsencrypt-auto certonly --renew-by-default --standalone --email 354867750@qq.com -d chenweikang.top -d www.chenweikang.top >> $logDir
- echo "start nginx : ok " >> $logDir
- #启动nginx
- systemctl start nginx >> $logDir
- echo "--------------------------结束---------------------------" >> $logDir
别忘了权限:
chmod +x /root/createSSL.sh
创建定时任务 crontab -e
- 30 23 */60 * * expect /root/createSSL.sh
转载请注明:左手代码右手诗 » 使用SSL证书,摆脱运营商流量劫持!